Steven Volk, September 14, 2014
Compared to our colleagues at most universities, our classes are blissfully small. Computer Science 61A enrolls nearly 1,100 students at Berkeley; Economics 10 topped out at more than 800 at Harvard. Still, many of the classes we teach are beyond the comfortable-discussion size of 10-15 students regardless of what our faculty-student ratio may indicate. That doesn’t mean we should abandon small-group discussions as a pedagogic strategy, but it does require some planning, especially in the critical step of socializing the information gained in smaller groups among the whole class. How can we use small discussion sections most effectively in classes that enroll 30, 50, or more students?

Why Discuss?
This post is more of a “how to” than a “why to,” but it’s still important to touch on the importance of discussion in student learning. A constructivist notion of learning, simply put, holds that understanding is gained by experience and reflection. When we encounter something new, we have to reconcile it with previously held ideas or experiences, figuring out how to make sense of the new knowledge. In that process we become the active creators of our own knowledge rather than sponges just absorbing what others tell us. While our students can (usually) reproduce what we tell them, learning is not the process of hearing-remembering-repeating, even though repeating and remembering may well be a part of ultimate learning. To learn means to ask questions, challenge ideas, explore unfamiliar territory, come to clarity in our own terms. As Ruth Tringham, a Berkeley anthropology professor put it, traditional teaching models are like banking, “where you pour knowledge into a student and hope to get some interest back,” whereas what we really want is for students to come “to grips with the questions themselves and learn to evaluate information.”
There are a lot of ways create an environment in which students can do this, not just one “best” practice. Most of these approaches involve active learning techniques such as experimentation, problem solving, and, of course, discussions. We all probably have experienced students who express (usually on their evaluation forms) a dislike of small group discussions. Since instructors “know” the answers, we should be doing the talking, not their peers who only read the stuff (or not!!) last night.
 Discussions are valuable for us in a number of ways: we can hear what questions (or answers) students are posing and propose ways for them to restate questions more usefully, They can help us suggest more fruitful questions, draw out important conclusions, underline misconceptions. Discussions can also be valuable ways to help students become more careful listeners, note takers, or observers, as well as learning to engage productively in a conversation with their peers.
Setting Up Discussion Groups
OK, enough of the theory; time for practice. Having decided on the utility of discussion in class and having decided to break the class into smaller sections rather than to have a faculty-directed “discussion of the whole,” what are some ways to go about it? Some faculty have decided to divide up their larger classes and meet in smaller groups one day a week; that can work, but, like labs in the sciences, it requires a lot of time on the part of the instructor.
Alternatively, many divide the class into smaller discussion groups during the class session, sending the groups to different parts of the room. This obviously works best in classrooms with flexible seating where chairs/tables are easily movable (speaking of which: Shouldn’t we have more of those?) Arranging small-group discussion in fixed seating amphitheaters often turns into an exercise in gymnastics.
Dividing the students up
For a very quick discussion (3-5 min), it’s a lot easier just to have students turn their chairs to those sitting next to them. For longer discussions, it’s better to mix them up since our restless students most often will sit in the same seat every class. Try counting off with all the #1’s in one part of the class; #2’s in another, etc., is an easy way to go. There are others.
You also need to decide whether all the groups will be discussing the same question or if each group will have a different question or problem to address. Decide on any rules or goals for the discussion: everyone must speak; there will be one note-taker, a different person must report back, each student is responsible for thinking about a different aspect of the question, etc. I’ve generally found it useful to have all the students write up a summary and some conclusions to their discussion both as a way of consolidating their learning from the discussion and as a way of helping them listen to their colleagues and take their ideas seriously.
Socializing Learning from Small Group Discussions
For me, the question of how you socialize the discussion that has been generated in the groups is both the most important aspect of small-group discussions and logistically the most persistent challenge. To get the most out of a discussion, the information gained in each of the groups needs to be shared. That’s the way that instructors can, in good constructivist fashion, help students restate questions in useful ways, underline relevant concepts, point to useful avenues for further research. You can sit in on each of the groups, but that often upsets its dynamic and, particularly when you have a lot of groups, you’ll only hear a small part of what’s going on. Here are some other suggestions:
- The most obvious point is to make sure you leave enough time for the whole-group discussion; how often we simply run out of time before bringing the groups together!
- Ask one person in each group to report out the group’s discussion;
- Have one person from each group write/draw some conclusions on the board as the discussions are coming to an end. As they do this, you can look at what is being written, find commonalities, differences, points you want to take up. You can also take a picture of the board with your phone and post it to Blackboard, which will allow you to refer back to what was written or start the next class with slides from the board.

Google Docs to the Rescue [Click on this link for short video on how to make and share a Google Doc]
I’ve found one other way to be extremely useful, although it requires some modest technology and that some students in your class have brought their laptops to class. You can generally count on this in large classes. (If you don’t permit laptops as a policy, you’ll have to plan ahead and ask some students to bring theirs. As a sidebar – if you want something useful on laptop use in the classroom, check out this article in the Chronicle of Higher Education from a few weeks ago).
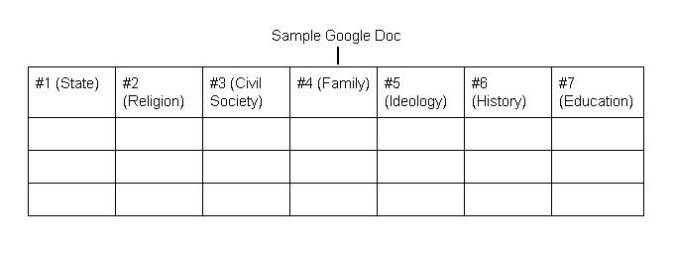
- Before class, open a Google Doc, give it a title (Discussion Sept. 21, 2014), and create as many columns as you will have groups. You can just label the columns 1, 2, 3… or you can give them a short description if each group will be talking about a different topic (#1-State; #2-Religion; #3-Civil Society…)
- Break the students up into groups, making sure that the groups contain at least one student with a laptop. Invite one student in each group, the one who has the laptop, into the Google doc you have created. This can be done quickly since they are all registered to Oberlin.edu addresses and once you type in a few letters of their email addresses, you will find them. They should soon be able to see the Google Doc that you have prepared.

- Assign that student with the laptop to make note of either the group’s main points or its main conclusions as the discussion develops.
- Make sure your own laptop connected to the classroom projector and is displaying the Google doc that you have created.
- As the discussion unfolds in each group, you will see what is happening in each of the groups.
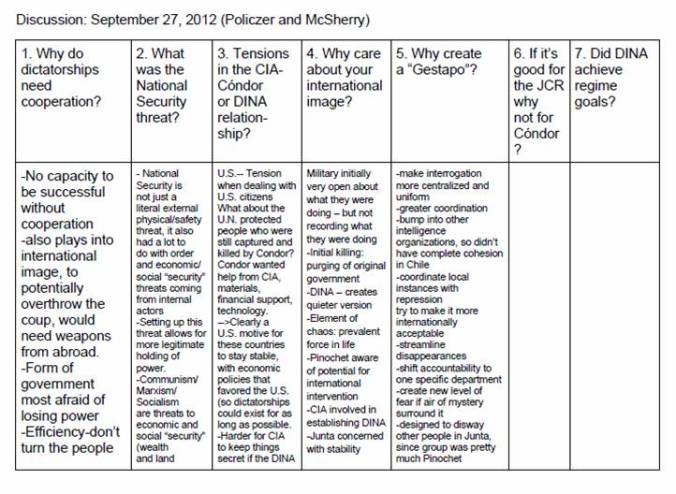
- When you call the class back together, you can synthesize their discussion and conclusions since all the groups are writing on the same Google Doc (although only in the column they have been assigned). Because you can see the discussions “develop” in real time, you can quickly find commonalities and differences, points that were missed, misunderstandings and fruitful avenues to pursue.
- Finally, you can save the document, which the whole class has produced, and make it available to the students (via Blackboard). You can have the students think about it the same way that you have begun in class. You can bring up the document at the start of the next class, or just archive it for the next time you offer that class.
In short, it’s a great way of socializing the learning that’s going on in the different groups, particularly as it allows you to “sit in” on each of them without changing their dynamic at all.
[Again, if you need a short video on how to create and share a Google Doc with your students, just click on this link.]
